Tuesday, March 24, 2015

The Bunny Blog Post

For some reason (it must be the season), it has been bunny time at home and at the shop. It started with this bunny which is a story in itself. I was looking for cute bunnies for my booth at Stella & Notte (used to be LaDida) where my Just A Second booth is now located (by the Farmers' Market location on North Main). And most of what I could find were caricatures of bunnies, not real looking bunnies. So I picked up a couple and decided to spray paint them to look like stone. I am happy with the result as in the photo to the right.


Lenten/spring Table scape: Purple, bare twigs, touches of green and bunny


My inspiration was this bunny I had at home. I purchased it at The Pink Cupboard when I was a vendor there. One winter I left it outside, and much of the coating came off. I was able to make it good as new with a darker stone look paint similar to what I referred to above. So note that they are indoor bunnies, not outdoor.


The bunny to the left makes that point as he is on the inside looking out. I have had my bunny on the front porch in the spring and summer, and he did just fine. I think it's the winter that did him in.


I left these bunny planters as is and may still plant them with herbs because they are not Easter bunnies as are none on this page. Easter bunnies have to wear hats, carry baskets, etc. These are regular bunnies, suitable for spring and summer decorating, and I would much rather have them in the house than outside wreaking havoc in the garden.


Finally, my poor weathered wood, chippy paint bunny that stays out year round - I usually add a bow and flowers to him for Easter and add him to the front porch as part of the Easter Sunday adornment.


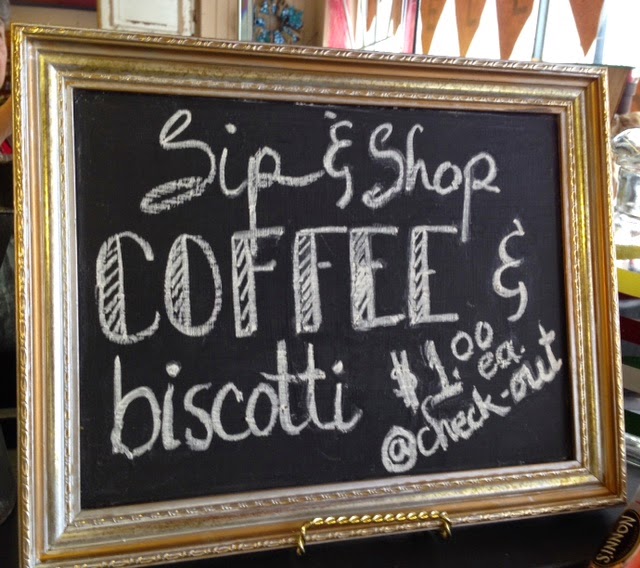
I am sure he will weather the snow as will the rest of us, and it will certainly make the return of spring all the more welcome. In the meantime, visit Just A Second at our new location at 1416 North Main In Stella & Notte for some Spring decor and gifts and stay a while for a really hot and tasty cup of coffee in our new little cafĂ© corner.  We look forward to your visit!

Friday, January 30, 2015

Trees falling, expletives sounding.....


 Learning is sometimes a slow and painful process. And what did we do without the internet? I can google whatever I am working on and get a blog or a video of someone who has done what I am doing and can provide the instruction I need. Unfortunately they cannot give me the practice nor the experience. I expect that by the 4th chair, I will have this relatively simple upholstering thing down pat, and I won't have made such a mess in the process.

The back of the chair started out empty. If the chairs had been covered when I got them, I would have used the fabric I removed as the pattern for the new cover. As it was, I had to make a pattern by tracing around the inside of the back of the chair onto some plain brown paper. Then I traced the pattern plus two inches all around onto the fabric I am using to put the picture in the frame (the fabric you see on the back side of the chair). A layer of cotton batting on the inside, without stapling, added some substance to the fabric, and a couple of strips of webbing stapled to the frame added support. I traced the same pattern onto the foam without adding a couple of inches and then had to cut it - no easy feat. (You see the foam roll to the right of the chair above.)

Researching further, I saw that you could buy a foam saw ($300) or use an electric knife, which I was fortunate enough to find at a thrift store. It is still not easy, but easier than trying to use scissors or an exacto type knife.

Next you spray the foam (go outside) with spray adhesive and wrap some cotton or other batting of your choice around the foam. This allows the fabric to lay nicer on the cushion and softens the edges of the foam. 


Inserting the foam and stapling the final fabric around it was the most difficult part of the process thus far. Here come the expletives! As you can see, there are some rough spots around the edges. Since this photo was taken, staples had to be removed, staples didn't grab...over and over and over again.

In the aftermath, staples were all over the floor. Foam pieces were all over the floor, fabric is all over the dining room table, tools and fabric and foam are all over the everyday eating area table.

Happy that no one else was in the house, which brings us to the title of this post: If a tree falls in the forest, (Sorry, couldn't resist) but no one is there to hear it, does it still make a sound? I am fairly certain it does. And I am not proud of my solitary outbursts. 


Resolved: Just as you do when making a dress or whatever, cut all the fabric and the foam and the batting and the webbing first, before starting to put it on the chair. That way all the fabric, foam, batting, and web mess is done. I am so impulsive.
I want to see it done NOW! I hope I am learning patience.
Next post will show the finished chair, much different than above (I hope). 


Tuesday, January 27, 2015

Taking on the Chairs

Quite a while ago I posted a chair on Facebook, four of which I purchased from Tina at our final sale, when Just A Second was still in our little building on North Main Street. We turned the keys over to the state of Illinois on December 12. The state took the building for the widening of North Main Street (Hwy 2).


So with the sorting and packing and moving, the chairs have sat in storage awaiting some free time - post Thanksgiving, post wedding reception for youngest daughter Faith and her husband David, post Christmas, post New Year's Day until this week. (That somewhat explains the long interval between posts.)


I asked John to bring one chair home from storage, so I can get started.


First I painted the frame white with Annie Sloan paint - pure white. Then I made a pattern of the back opening so I could cut the four fabric pieces for the chair backs.


The fabric on the seat at left is actually more grey than photo shows. That will go on chair front and seat. It has a nubby, sort of rough linen look and feel.


Below is the patterned back. It is a pale grey and pure white toile.


Since I don't have my shop work space, all is being done in our eating/family room area. It will drive me crazy more than it will bother John to have this "mess" around for as much time it is going to take to do four chairs.


This is going to be quite a process for me, and more than I have done previously to get items ready to sell. Hope I don't try your patience, as I post the step by step process.  Stay tuned.


Monday, November 17, 2014

The Blue Bathroom

I spent much of last week redoing a small bathroom off one of our bedrooms - Faith's old bedroom - the room which John has temporarily taken over as his work room. The bathroom is definitely dated as far as fixtures go, but, will have to remain as is for the moment.


The walls were white with a few royal blue graphics on them and they (the walls) really needed painting.  I was also tired of the random shapes I had painted on each wall. 

I decided to do all the walls blue and to paint the oak medicine cabinet and light strips white, as well as the towel bars, switch plates, and tp holder which were also all oak. I happen to not be an oak fan. I love old pine furniture, and, of course painted furniture, so I rarely hesitate to paint anything. The light strips are dated also, but so am I, and so is our house which was built in the 20's.

Paint is the least expensive means of changing the look of a room and can really make quite an amazing difference.

I am sorry I did not take a "before" photo. I was too embarrassed to have anyone see it.

I am very happy with the result. The floor is also old,
but it is ceramic tile in very good condition, and I actually love the way the gold goes with the blue, so it, too, will stay.


You can see the print which needs framing resting above the towels.


I really love the fact that I did not have to buy anything new. I shopped in the house and at the shop which is getting depleted as we continue to  move to East State, but it did have the fish which is now sitting on top of the medicine cabinet. The other large metal fish was in the adjacent bedroom.

I also had all the white towels, because that is about the only color towels I buy in order that I can bleach them. I had the royal blue hand towels which were purchased to add more color to the formerly white bathroom.


The print above is by Rockford artist, Ann Remington. It is one of John's favorites, and we have never had it framed, so that is now on the agenda. With a white frame,  it will be perfect above the towel rack on the largest wall, the rack on which it is resting in the photo above.

The title of the print is "Coming Home", which I think is very appropriate for this time of year when the kids, in fact, come home.


Monday, October 27, 2014

Adding items to my Booth

 I am enjoying having the freedom a booth allows. I can come and go and yet my booth remains open everyday from 10 - 7. 

I went over Sunday evening to add a few items and noticed that I have been painting with a lot of shades of grey lately, ( funny how a simple phrase can make you think twice - no reference to that awful book:) from charcoal to very light, from silver to bluish. 


I added a small candle stand Sunday evening. I was amazed earlier, to see that depending on age and style and condition, the price of candle stands can vary in price, from as little as $20, to more than $1500. 

The one I brought in probably dates to no earlier than the 1970's. It was dark pine and had seen a little bit of  wear so I decided to paint it a pale grey and then distress it a bit. 


I also brought in some silver-plate. When I found it, it was beyond nicely tarnished. It was so black that it was difficult to determine the condition and whether it was just plated or better. 

After a lot of polish and much elbow grease, I was able to see that most pieces were indeed plated, but one lovely piece was actually sterling! 

As I start to think of Christmas, I am drawn to more ornate pieces and love to put them in a rustic setting and then add a bit of color. Ordinarily, I do not like to rush Christmas, but since our Holiday Open House is November 8, I have no choice.  So the pumpkin gourd to the right will soon be replaced with a vintage ornament.


I don't know if you can see it in the photo or not, but the pine cone looks as though it is tipped with frost or snow. It is actually sap.
When I was returning from my walk last Friday morning I noticed many of these pine cones, so, of course, had to gather them up. Many had long dry pine needles stuck to them, and by the time I got home I was stuck to them, also.

I put them on the patio table hoping the sap will harden and be less sticky so I can use them for my Christmas booth.

I hope you can join us for our holiday event - "Everything Old is New Again". Several vendors, myself included, will have demonstrations in our booths on repurposing vintage items for decorating, or wrapping packages, or adding to newer goodies to give your gifts and home a special touch.

Our "tea lady" will serve tea and home made treats to make you feel welcome and help get you in the mood for celebrating the holidays.


Friday, October 24, 2014

Hoping to get back on track with Posting

Greetings!
I apologize for the long pause in posts. Our lives are not our own. Since our shop on North Main has been purchased by the state of Illinois for its Highway 2 widening, we have been trying to figure out where a shop full of books and store inventory and workspace for painting, and space for consulting are all going to go. 

My store is now in the East State Antique Mall, as many of you may already know, but, of course I went from 4 rooms in the shop to one booth in the mall. Obviously, there are many items left after the partial move. Fortunately, a few small tables have sold, as well as my large breakfront, and most recently my black hutch. So, I have been able to move more items to my booth.


I am happy to report that many of the "Halloween" items also sold, the portrait, the candelabra, some tarnished silver-plate....all items which get "repurposed", as Halloween decor. I love using what I have or finding something which isn't specific to just one holiday. 

With different candles and some greens, the candelabra could be perfect for Christmas. (if I still had it)

The task ahead is to finish redoing furniture at the shop, while I still have the space to do it. 

Meanwhile Halloween is fast approaching, and we have to get into high gear for Christmas.


Example: two ads, same event, minor changes, but whole different feel. First step ads, 2nd step, redo the booth. I love that part.

Hope you can join us. I will be there and hopefully be able to see some dear, familiar faces.

Friday, August 29, 2014

Talk about Labor Day!!!


I thought moving to a booth would simplify my life a bit. And I guess that, since we are still in the relocation mode, we are not yet in the simplification stage. However, not only have things not been simplified, but selling one BIG piece that took up almost all of the back wall of the booth, has put me in the fast forward mode.


I have learned very quickly that I must find and redo more furniture so that I have more of a back log, items ready to fill in when something sells.

Yesterday and the day before were spent getting at least a few more things ready to go.
I have had the items in the picture below for a while, but decided to give them a face lift and update.
light wood kidney-shaped table and hairpin-back chair


Painted chairs


First step was to wash down the chairs and remove the seats in order to paint the frames. I used a spray enamel (much easier with all the small curved surfaces).  I didn't take a photo of the table-just plain black. I was probably focused too much on what I was going to do to embellish it. My thought was basically a starburst (sonic, atomic).


computer generated star embellished


Then I started the painting. First I had to make stencils out of stiff, coated paper.
It is basically a free hand design, I laid out the varying sizes of "points" and stenciled them in turquoise, being careful to do opposite sides so I didn't smear wet paint. Of course, I did smear wet paint. The points are not perfect; neither am I. (I am sure that is difficult for John to believe:). 

I then tried to cut out a circle but could not get it smooth enough, so I ran up to our trusty Dollar Superstore and found a geometry stencil with two different size circles on it.


I stencilled circles on the star points alternating red and gold, and today I have to varnish the top, so the surface and painting will be protected. It will be fast-drying varnish, so that I can get the three pieces over to the antique mall, before the big breakfront is removed. 

Then, of course, I will have to rearrange the booth with a new centerpiece on the back wall. Can you guess what theme will take center stage?


No, it is not real.  It is actually a vase. How cool is that!
What do you put in a skeleton head?!?


After all that,  I will be set for the BIG event of the weekend. Yes, it's the same link as above, but be sure to click to get the details on the "flea". And, while you are there, please "like" their page, so you can continue to get these announcements. Also be sure to "like" Just A Second,  so we can stay in touch. 

Looking forward to your visit!